Record an expense on a job
Record an expense on its job, with the amount and any receipts. Expenses never show on the customer's invoice.
Add an expense
On the web:
- Open the job.
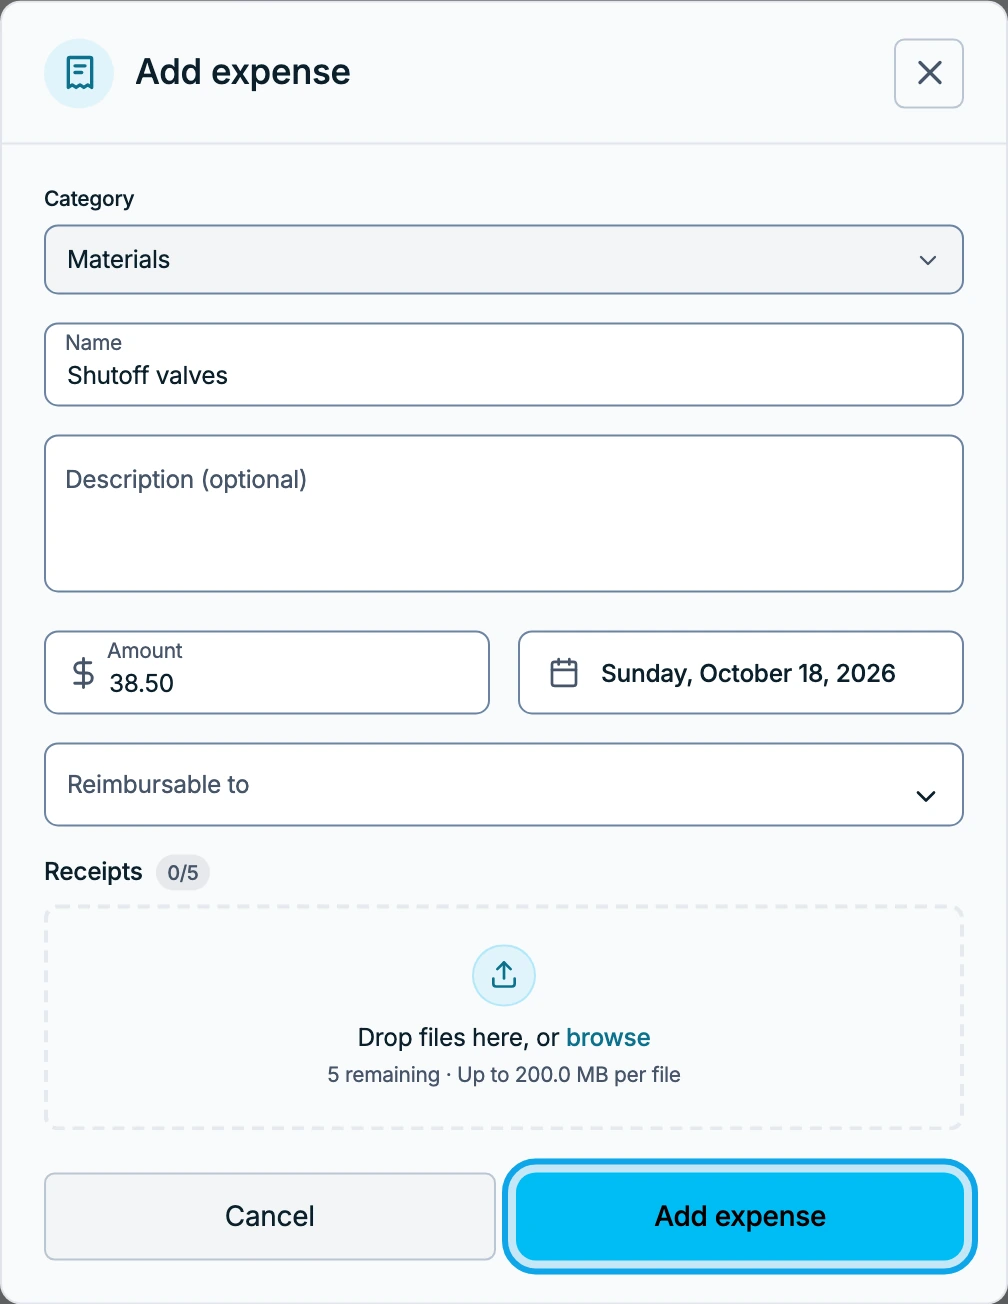
- Press Add expense on Job costs or My expenses.
- Pick a Category.
- Type a Name and Amount.
- Set the Date.
- Add any Receipts.
- Press Add expense in Add expense.
On an empty Job costs card, press the Expense row instead.
In the Zaras app:
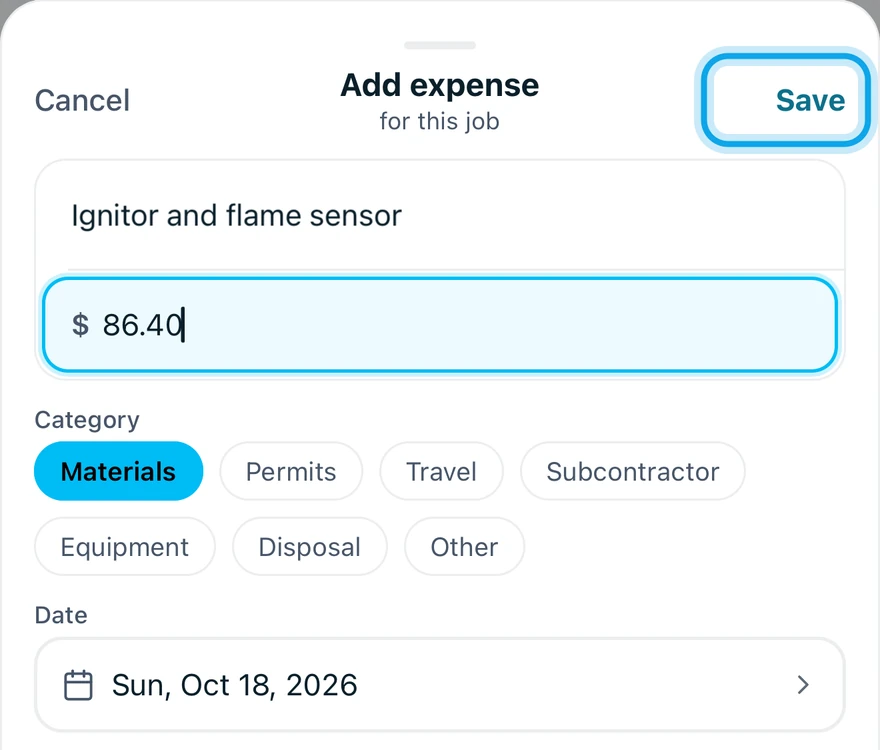
- Open the job and tap Add expense.
- Type the Expense name and Amount.
- Pick a Category.
- Pick a Date.
- Tap Save in the sheet's header.
Paid for it yourself? Turn on Paid with my own money. Owners and admins pick a teammate under Reimbursable to instead. Zaras records who is owed. Paying them back happens outside Zaras.
What you see
Expense added confirms it, and the expense joins the card. A paperclip shows how many receipts it has.
Technicians also see them in My Expenses on Home. In the app, tap one to open it.
Who can do this
Seeing every expense needs View cost & profit. Owners and admins hold it by default. They see Job costs with the total, and can edit or delete any expense.
Everyone else sees My expenses, only their own, and can still add them. To see more, ask an owner or admin under Settings → Team & roles → Roles.